Particle System
A guide on how to implement a particle system
Project maintained by Lladruc37 Hosted on GitHub Pages — Theme by mattgraham
This project was created by Sergi Colomer Ferrer for the Project II subject in the Bachelor’s degree in Video Game Design and Development, under the supervision of Ramon Santamaria Pena
Index
- Introduction
- Market study
- My approach
- TODOs and Solutions
- TODO 1: Set up the emitter
- TODO 2: Particle constructor
- TODO 3.1: Updating alive particles
- TODO 3.2: Drawing alive particles
- TODO 4.1: Particle interpolation
- TODO 4.2: Particles deletion
- TODO 5.1: Color interpolation
- TODO 5.2: Modify DrawParticle
- TODO 5.3: Debug mode
- TODO 6: Make fire
- TODO 7: Bubbles
- Possible improvements
- Presentation
- Documentation
Introduction
A particle system is a structure that allows you to simulate particles of different types in a somewhat organic way with the advantage of just tweaking some particle properties to get the exact results you want very quickly and without much effort. Particle systems are highly object oriented. Particle systems are quite important in games in order to add to the visual representation of the whole feel of the game, you could say they are what gives life to the game.
Organic effects are difficult to simulate but what particle systems do is simplify the problem. By managing a large group of particles we can represent natural effects like water, fire or smoke so much easier than if we tried to treat it as a whole thing. Nowadays particle systems can be found in almost any (dare I say every) game engine or 3D software.
I want to keep my program understandable for everyone and generic enough that anyone could implement in their project with almost no modifications. I also want to have a well structured and flexible system. If you have a good structure, you should be able to easily create new particle effects on top of it with little resistance. Of course the base code should be solid and work properly. This system should be flexible enough to develop new and more complex features adding to the particle system.
Another important thing that I want to remark is that the way I’m going to explain how to implement the system is definitely not unique and probably not the best. There are lots of ways to do this and there is plenty of professional people that know a lot more that I do. If you want to learn more about how to implement a particle system I encourage you to check the documentation that helped me doing this.
By the end of the web, if you have been following with the exercises you should get something like this and much more:

Let’s see what’s out there in the internet.
Market study
It’s quite common to work with sprites and sprite sheets, which for those unfamiliar with the term it’s just a texture used to render both static and animated elements in a game. Ususally, nowadays less, these images are in pixel art form.
Here you have some examples of different sprite sheets:
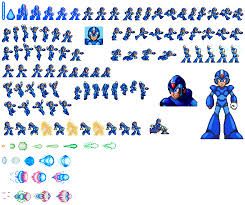
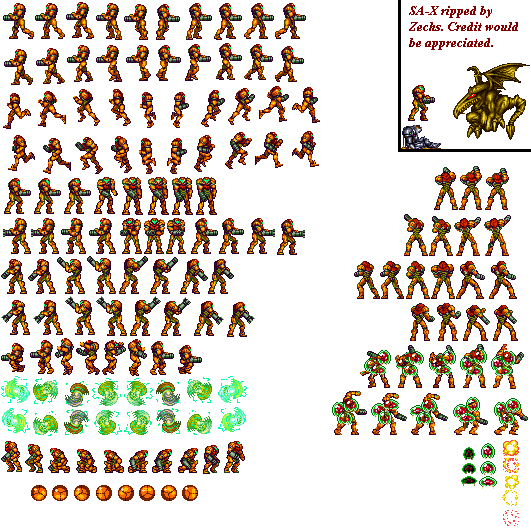
Even though this particle system is made considering a 2D game, here you have a 3D example:
Let’s see what composes a particle system.
Components
Particle system
The particle system in itself contains all emitters created, defines the emitter behaviour and properties and both spawns and despawns emitters if told to do so. It’s in charge of managing everything particle related for us so we don’t have to touch any of the emitter and particle code to affect these.
William T. Reeves, Researcher at Lucasfilm who worked in one of the first implementations of a particle system, describes one as such:
“A particle system is a collection of many minute particles that together represent a fuzzy object. Over a period of time, particles are generated into a system, move and change from within the system, and die from the system.”
A particle system can be composed of various different kind of emitters that at the same time can also have emitters inside of them. This parent-child relation can go on as far as we want, depending of what we want to simulate it would be very useful. By using this hierearchy there’s a particle system which acts as a parent and contains subsystems that contains other subsystems.
Emitter
An emitter is the object in charge of spawning all the particles and defining the particles behaviour and properties, very similar to the particle system to the emitter. An emitter is in charge of the following parameters:
- The emission rate of particles. As it’s him the one creating them each frame it basically means how many particles are spawned per frame.
- The postion where the particles are generated. That could mean the same position of the emitter or a different one (usually) in relation to the emitter’s position.
- The particle’s velocity and movement in the scene.
- The particle’s life until it is destroyed.
- Other particle properties like color, transparency, size…
The emitter itself contains all the particles that will be updated, drawn and eventually die over a period of time. All this data is transfered from the emitter to all this particles so they behave like they are suposed to. Changing this data will change the particles of that emitter too, affecting their behaviour accordingly.
Particle
As said before particles inherit its properties from the emitter they came from. But what is exctly the particle itself? The particle itself it’s just a simple moving texture that is renderered on screen. In 3D enviroments they use something called billboards which is basically an image that always faces the camera. But we don’t need to worry about that as we will focus only in 2D.
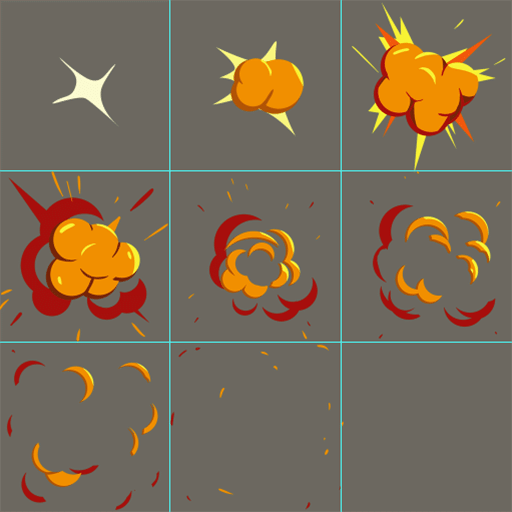
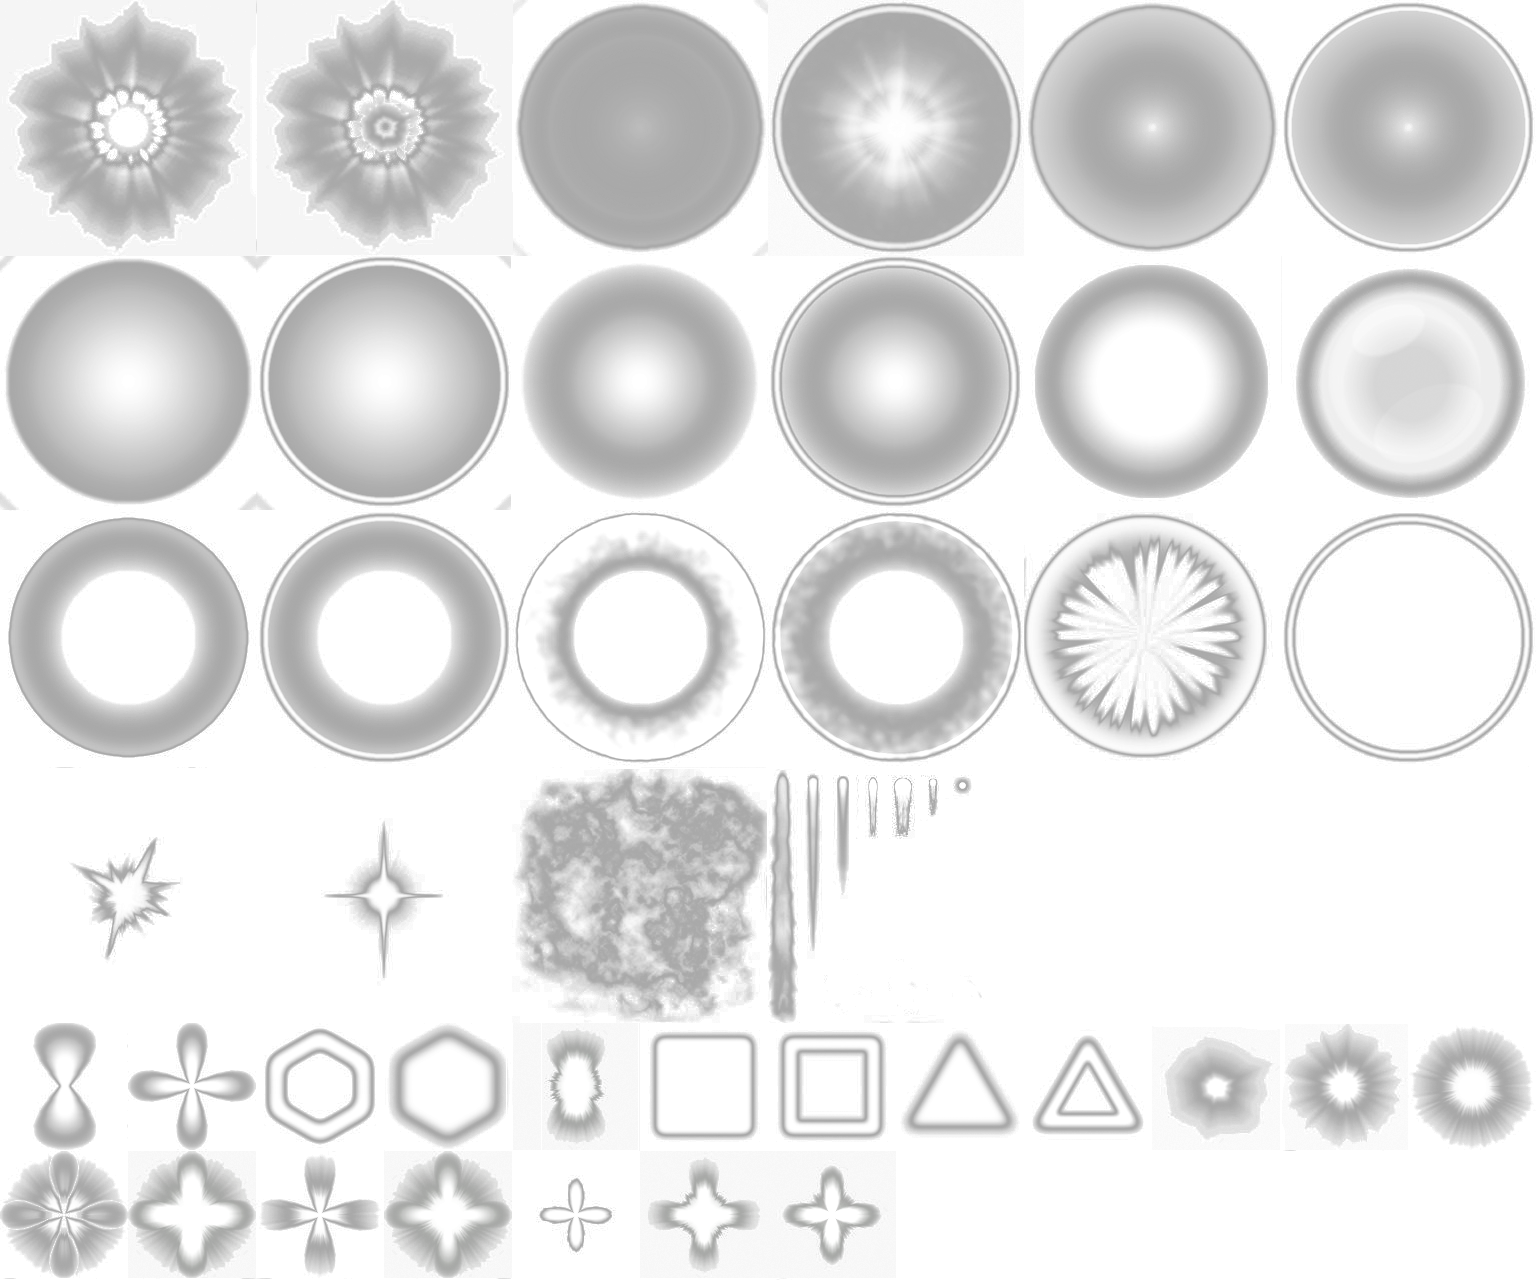
This texture can be anything we want that fits our purpose. It’s almost always a balck and white texture that will be colored when rendering. A good example is this set of particle textures I gathered:
Particle properties along with the emitter can be anything you like. As an example, the Unity engine has a big spectrum when it comes to emitters and particle properties, which of course you can change anything you want thus allowing you to generate almost any type of particle you can think of.
David Finseth, Technical Artist at Synapse Games describes particle effects like so:
“Particle effects are a unique tool that can add interactivity and responsiveness to your games. They excel at creating a lot of movement and impact. Particle effects can be used to create magical fireballs, swirling dimensional portals, or for directing the player’s attention to a glowing treasure chest.”
Here you have a video I found very interesting of how particles are done in League of Legends and a bit of explanation from one of the devs:
How are this particles managed thorugh the system? Do we need to generate a new particle every time? If so, will this affect the overall preformance of the game? Let’s see what I have done when implementing this theory.
My approach
My particle system will have the following features:
- 2D implementation (although almost everything explained can be easily transfered into 3D if needed).
- Particles movement will be linear but will have the option to interpolate between the initial speed and final speed.
- A particle atlas with some particle textures will be used to draw different types of particles on the screen.
- The data properties will be compacted in a single function called
LoadEmittersData()found in the Particle System module. - A pool/list will be used as a container for the particle system containing emitters and for each emitter containing particles.
- Diferent type of emitters, hence diferent particles will be created through parametrization. There will only be an emitter and particle class, and depending of the data they both recieve the end result will be different.
- Emitter properties will be covered more in depth later but here you have a list:
- Rotation speed
- Angle range
- Particle speed
- Particle size
- Emission rate
- Emitter life
- Particle life
- Particle texture
- Particle color
- Particle blend mode
- Vortex active
- Half texture
To create an emitter we will call a function in the scene that will return a pointer to the emitter created. With this pointer we can call emitter methods for stoping and starting the vortex or destroy itself. The function call should look like this:
fires.Add(app->particleSystem->AddEmitter(pos, EmitterData::EmitterType::FIRE));
Particle System Module
This is the module in charge of everything particle related. I will not cover how it works in detail as it’s something generic that should be implemented according to your needs and this project is focused mostly on the particles. With this module you can:
- Despawn an emitter
- Despawn all the emitters
- Spawn an emitter
- Update all the emitters
- Control emitters destruction process
- Get the particle atlas (needed for the particle)
- Load all emitter’s data
Emitter Class
This is the class in control of the actual particles, which parameters to pass, how many particles to create, when to delete particles… Equally to the particle system module I will not go very much in depth as to the Emitter code. To sum up it controls the particles essentially in three ways: Creation, Deletion and Randomization of the parameters. With this module you can:
- Manage the parameters given to the particle and randomizing them for more realism
- Spawn particles
- Despawn particles
- Update all particles
- PostUpdate all particles (draw)
- Self-despawn
- Generate a random number (used for the particle spawning)
- Move the emitter
- Set/Get vortex activation bool
Particle Class
This class is actually pretty simple if it is kept basic. It is given a lot of data that will define and diferenciate the various types of particles. To go along with this, there are a few functions to draw, update and prepare for deletion of the particle. A particle in its essence is a moving point in space with a texture. Here you have a diagram of the most basic particle:
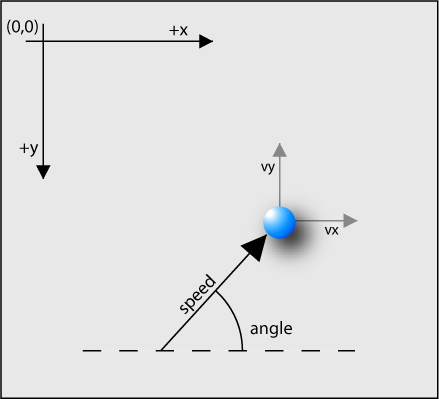
A particle will be a class with a position, a vector velocity and a texture (represented by a rectangle indicating the position and size inside the atlas). In this case I will add a lot more data but that’s something optional depending of what you want to do. This particle will have a constructor for setting everything up, an update method to move them and a draw one to render them on screen and that’s it.
These are the variables that will be stored inside a particle:
class Particle
{
public:
	// Constructor
	Particle(variables used to create the particle);

	// Called each loop iteration
	void Update(float dt);

	// Draws the particle
	bool Draw();

private:

	fPoint pos;
	fPoint curSpeed;
	fPoint curSize;

	SDL_Rect pRect;

	uint life;
};
Inside the Update(float dt) function I will move the particle according to its velocity and using the angle which I will get from the emitter and dt for accurrate speeds.
It should look something like this:
curSpeed.x = speed * cos(DEG_2_RAD(angle));
curSpeed.y = -speed * sin(DEG_2_RAD(angle));

pos.x += curSpeed.x * dt;
pos.y += curSpeed.y * dt;

// Particle's life decrease
life--;
Now inside the Draw() function I will draw the particle in its position. Just as if you wanted to draw a normal texture.
It should look similarly:
ret = app->render->DrawParticle(app->particleSystem->GetParticleAtlas(), pos.x, pos.y, &pRect);
And:
bool Render::DrawParticle(SDL_Texture* texture, int x, int y, const SDL_Rect* section, float speed, double angle) const
{
	uint scale = app->win->GetScale();

	SDL_Rect rect;
	rect.x = (int)(camera.x * speed) + x * scale;
	rect.y = (int)(camera.y * speed) + y * scale;

	if (section != NULL)
	{
		rect.w = section->w;
		rect.h = section->h;
	}
	else
	{
		SDL_QueryTexture(texture, NULL, NULL, &rect.w, &rect.h);
	}

	rect.w *= scale;
	rect.h *= scale;

	if (SDL_RenderCopyEx(renderer, texture, section, &rect, angle, NULL, SDL_FLIP_NONE) != 0)
	{
		LOG("Cannot blit to screen. SDL_RenderCopy error: %s", SDL_GetError());
		return false;
	}

	return true;
}
That’s pretty much it for the basics. My system will have many more properties but for now let’s keep it simple.
EmitterData
I have a lot of parameters in my code (more especifically in the load emitter data function mentioned previously), this table will be used to explain all these in an orderly manner.
| Parameter | Description |
|---|---|
| rotSpeed | The rotational speed at which the particle will spin. |
| angleRange | The angle representing the direction the particle will take when moving. |
| initialSpeed / finalSpeed | The initial and final speed values determining how fast the particle will move. |
| initialSize / finalSize | The initial and final particle size in the case you want to vary the size of the particle as time goes. |
| emitNumber | Determines how many particles are spawned each frame. |
| emitNumMult | An offset to the number of particles spawned each frame. |
| maxParticleLife | The amount of time a particle spawned by this emitter will last before it is destroyed. |
| emitLifetime | The maximum amount of time an emitter can be alive regardless if there are particles still alive or not. |
| texRect | The texture section we want to draw on screen. |
| initialColor / finalColor | The initial and final color values determining what color the particle will have at every frame. |
| blendMode | The type of draw we want to use for the particle (usually add but in some cases I can see blend being useful). |
| randRotSpeed | Parameter to randomize the rotation speed within the given range. |
| randInitialSpeed / randFinalSpeed | Parameters to randomize the initial and final speeds within the given ranges. |
| randEmitMult | Parameter to randomize the offset of the particle spawning within the given range (so it’s even more random). |
| randLife | Parameter to randomize the life of the particle within the given range. |
| randInitialSize / randFinalSize | Parameters to randomize the initial and final particle sizes within the given range. |
| vortexActive | Parameter to determine if the particle should be affected by the vortex or not. |
| halfTex | Parameter to determine if the particle uses only half the texture (so the particle center is actually in the bottom). |
| eType | The type of emitter. To diferenciate an emitter from another one. |
I put a lot of randomization to make it look more real and organic…
Special Function: Moving fires
It’s very easy but I thought I would explain it since it’s not explained anywhere. I use a simple bool and if it’s active all fire emitters are updated to move to the mouse position. If it’s turned off all the fires will stay to the last updated position.
The code to do that:
// All current and future fires will now (toggle) follow/not follow the mouse
if (app->input->GetKey(SDL_SCANCODE_F8) == KEY_DOWN)
{
	if (!movingFire)
	{
		LOG("Fire will now follow the mouse");
	}
	else
	{
		LOG("Fire will now stop following the mouse");
	}
	movingFire = !movingFire;
}

...

// Logic for moving the fires
if (movingFire)
{
	ListItem<Emitter*>* fire = fires.start;
	while (fire != nullptr)
	{
		fire->data->MoveEmitter(pos);
		fire = fire->next;
	}
}
Special Function: Vortex
It’s actually very simple, just some math involved and the results are great! I need the position of the vortex, the speed or power of the vortex and its scale or radius:
struct Vortex
{
public:

	fPoint pos;
	float speed;
	float scale;
};
And the actual code that makes the particle be affected by the vortex should look like this:
void Particle::CalculateParticlePos(float dt)
{
	fPoint dif = { pos.x - vortex.pos.x, pos.y - vortex.pos.y };
	fPoint vel = { -dif.y * vortex.speed, dif.x * vortex.speed };
	float inversePower = (dif.x * dif.x + dif.y * dif.y) / vortex.scale;
	float power = 1.0f / (1.0f + inversePower);
	pos.x += (vel.x - curSpeed.x) * power + curSpeed.x * dt;
	pos.y += (vel.y - curSpeed.y) * power + curSpeed.y * dt;
}


I have also a Set/Get functions but there is nothing really to explain about them so I will just move on to the results.
Results
The results I got after some time making the particles are these:
- Fire
- Smoke
- Nova

- Slash
- Bubbles

- Heal

- Bless

- Stop Vortex
- Debug
TODOs and Solutions
TODO 1: Set up the emitter
You need to store the given variables by the particle system to a EmitterData variable.
You will also have to calculate the maximum particles that are able to spawn each frame. I would use both the emitNumber and the emitNumMult to do that.
Finally, you also need to start a life timer for the actual emitter since you want it to die if the lifetime given is surpassed.
The result should be this:
this->pos = pos;
this->data = data;

// Calculates the particle cap
maximumParticlesPerFrame = data.emitNumber + data.emitNumMult;

// Life timer start
if (this->data.emitLifetime != -1.0f && this->data.emitLifetime > 0.0f)
{
	lifeTimer.Start();
}
TODO 2: Particle constructor
You need to assign the values given and use them to define the particle’s parameters. You will need to change the speed(s) (in both axis) taking into consideration the angle given And don’t forget the timestep so you can interpolate between the initial state of the particle and the final state of the particle.
The result should be similar to this:
// Movement properties
this->pos = pos;
this->initialSpeed.x = initialSpeed * cos(DEG_2_RAD(angle));
this->initialSpeed.y = -initialSpeed * sin(DEG_2_RAD(angle));
this->finalSpeed.x = finalSpeed * cos(DEG_2_RAD(angle));
this->finalSpeed.y = -finalSpeed * sin(DEG_2_RAD(angle));
this->curRotSpeed = this->rotSpeedIncrement = rotSpeed;

// Size properties
this->curSize = this->initialSize = initialSize;
this->finalSize = finalSize;

// Color and texture properties
this->pRect = this->rectSize = texRect;
this->initialColor = initialColor;
this->finalColor = finalColor;
this->blendMode = blendMode;

// Life properties
this->life = this->initialLife = life;
timeStep = 0.0f;

// Vortex property
this->vortexActive = vortexActive;

// If half a texture
this->halfTex = halfTex;

pendingToDelete = false;
TODO 3.1: Updating alive particles
It’s as simple as going through the pool/list of particles and calling the function.
The expected result:
// Update all alive particles
ListItem<Particle*>* p = particlePool.start;
while (p != nullptr)
{
	if (p->data->IsAlive())
	{
		p->data->Update(dt);
	}
	p = p->next;
}
TODO 3.2: Drawing alive particles
Very similar to the past TODO, go through the pool/list and call the function.
The resulting code should be like this:
ListItem<Particle*>* p = particlePool.start;
while (p != nullptr)
{
	if (p->data->IsAlive())
	{
		if (!p->data->Draw())
		{
			ret = false;
		}
	}
	p = p->next;
}
TODO 4.1: Particle interpolation
Sounds hard but it’s actually pretty easy. You should increase the current rotation of the particle by its rotational speed, increment the timestep and check if the particle’s life has surpassed 1.0f. If so prepare it for deletion.
The code should be similar to this:
// Calculates the new rotation according to the rotation speed
curRotSpeed += rotSpeedIncrement;

// Time step increment to interpolate colors and size
timeStep += (1.0f / (float)initialLife);

if (timeStep >= 1.0f)
{
	timeStep = 0.0f;
	pendingToDelete = true;
}
TODO 4.2: Particle deletion
Remember where you draw the particles? Now we will also delete the dead particles. Since it’s in the PostUpdate() it shouldn’t bother anyone.
This updated code should look as such:
ListItem<Particle*>* p = particlePool.start;
while (p != nullptr)
{
	if (!p->data->IsAlive())
	{
		DestroyParticle(p->data);
	}
	else
	{
		if (!p->data->Draw())
		{
			ret = false;
		}
	}
	p = p->next;
}
TODO 5.1: Color interpolation
You have set up the interpolation but not everything is working right away. Now create a function based on the function InterpolateBetween(float min, float timeStep, float max) that as time moves the color changes from the initial color to the final color.
The code solution for both the function and the call of such:
SDL_Color Particle::InterpolateColor(SDL_Color initialColor, float timeStep, SDL_Color finalColor)
{
	SDL_Color resultingColor;
	resultingColor.r = initialColor.r + (finalColor.r - initialColor.r) * timeStep;
	resultingColor.g = initialColor.g + (finalColor.g - initialColor.g) * timeStep;
	resultingColor.b = initialColor.b + (finalColor.b - initialColor.b) * timeStep;
	resultingColor.a = initialColor.a + (finalColor.a - initialColor.a) * timeStep;

	return resultingColor;
}

SDL_Color resColor = InterpolateColor(initialColor, timeStep, finalColor);
TODO 5.2: Modify DrawParticle
Now you have all these parameters but you can’t use them for drawing the particle. You should change that.
The resulting function can vary a lot but I did it like this:
bool Render::DrawParticle(SDL_Texture* texture, int x, int y, const SDL_Rect* section, const SDL_Rect* rectSize, SDL_Color color, SDL_BlendMode blendMode, float speed, double angle, int pivotX, int pivotY) const
{
	uint scale = app->win->GetScale();

	SDL_Rect rect;
	rect.x = (int)(camera.x * speed) + x * scale;
	rect.y = (int)(camera.y * speed) + y * scale;

	if (rectSize != NULL)
	{
		rect.w = rectSize->w;
		rect.h = rectSize->h;
	}
	else if (section != NULL)
	{
		rect.w = section->w;
		rect.h = section->h;
	}
	else
	{
		SDL_QueryTexture(texture, NULL, NULL, &rect.w, &rect.h);
	}

	rect.w *= scale;
	rect.h *= scale;

	if (SDL_SetTextureColorMod(texture, color.r, color.g, color.b) != 0)
	{
		LOG("Cannot set texture color mode. SDL_SetTextureColorMod error: %s", SDL_GetError());
	}
	if (SDL_SetTextureAlphaMod(texture, color.a) != 0)
	{
		LOG("Cannot set texture alpha mode. SDL_SetTextureAlphaMod error: %s", SDL_GetError());
	}
	if (SDL_SetTextureBlendMode(texture, blendMode) != 0)
	{
		LOG("Cannot set texture blend mode. SDL_SetTextureBlendMode error: %s", SDL_GetError());
	}


	if (SDL_RenderCopyEx(renderer, texture, section, &rect, angle, NULL, SDL_FLIP_NONE) != 0)
	{
		LOG("Cannot blit to screen. SDL_RenderCopy error: %s", SDL_GetError());
		return false;
	}

	return true;
}
TODO 5.3: Debug mode
Now you have a good looking particle we should show each particle’s hitbox. Do it by using the DrawRectangle(const SDL_Rect& rect, SDL_Color color, bool filled, bool useCamera) function.
Expected result:
// Debug drawing rect
if (app->render->debug)
{
	SDL_Color debugColor = resColor;
	debugColor.a = 100;
	app->render->DrawRectangle({(int)pos.x - rectSize.w/2,(int)pos.y - rectSize.h/2,rectSize.w,rectSize.h}, debugColor);
}
TODO 6: Make fire
Everything should be coming together now, modify the LoadEmittersData() function data inside it so that it suits you!
TODO 7: Bubbles
Alright! This is to prove your skills. Create a new emitter with the idea of making bubbles. It should be easy if you have been paying attention!
Possible improvements
The particle system works and is very cool! But there is still a lot of room for improvement. I will list a few things that could be done if put a bit of time:
- Vortex mechanic: An emitter that creates vortexes that affect particles. Think of it as turbulences.
- Subemitters: As the name says, create an emitter that creates emitters. Easy example could be fireworks.
- Multiple phase emitter: Create an emitter that spawns different type of particles. Super useful and could be used for an explosion!
- Animated particles: Instead of drawing a texture why not draw an entire animation in loop? It would be very useful for more complex particles.
- Physics: Of course, I have done a vortex but you can do so many things with this it’s mindblowing. Parabolic movement, various types of turbulences and much much more!
- Collisions: You could easily add collisions to every particle so they collide with eachother to create better and more interesting effects.
- Half texture: I even started implementing that. So you can move the center of the particles for when in varies in size you don’t have to worry of seeing bad results.
Presentation
I have uploaded the presentation as a pdf but I would recomend you to watch it through this link (as you will be able to see the gif and videos).
Documentation
Links I used either to learn of the topic or I found useful while making this project:
- https://www.khanacademy.org/computing/pixar/effects/particle/v/effects-overview
- https://www.youtube.com/watch?v=6Z5FI5180oo
- https://github.com/scarsty/SDL2-particles
- https://www.youtube.com/watch?v=eyo9jRsJBwY
- https://discourse.libsdl.org/t/2d-lighting-particle-effects/20480
- https://www.pascalgamedevelopment.com/showthread.php?5863-SDL-amp-2d-particles
- https://www.reddit.com/r/learnprogramming/comments/8up5q9/c_sdl2_particle_system_tutorials/
- https://gamedev.stackexchange.com/questions/33670/what-features-do-basic-particle-engines-have
- http://buildnewgames.com/particle-systems/
- https://www.bfilipek.com/2014/04/flexible-particle-system-start.html
- https://subscription.packtpub.com/book/game_development/9781785882722/9/ch09lvl1sec85/creating-a-particle-system
- https://www.youtube.com/watch?v=OczfR1UhMPg
- https://stackoverflow.com/questions/11910181/how-to-implement-direction-in-a-2d-particle-system
- https://gamedev.net/forums/topic/380009-where-can-i-find-a-2d-particle-system-tutorial/380009/
- http://wiki.libsdl.org/CategoryRender?highlight=%28particle%29
- https://gamedev.net/forums/topic/627017-2d-particle-effects-39where-do-i-begin39/4954379/
- https://www.youtube.com/watch?v=f2zZfj8eq_Q&feature=emb_title
- http://gameprogrammingpatterns.com/object-pool.html
- http://gameprogrammingpatterns.com
- https://gamedevelopment.tutsplus.com/tutorials/adding-turbulence-to-a-particle-system–gamedev-13332
- https://github.com/nintervik/2D-Particle-System
- https://github.com/nintervik/2D-Particle-System/tree/master/docs
- https://nintervik.github.io/2D-Particle-System/
- https://www.gamasutra.com/blogs/DavidFinseth/20180216/314707/Creating_2D_Particle_Effects_in_Unity3D.php